Refresh loader

Category : Maintenance

Home > Archive for Maintenance

Annual Electrical Inspection

This is something that should be done more than once a year, but at minimum it should be done at least annually. That is the electrical inspection of your motorcycle. This is to ensure that everything is functioning the way it should as far as lights, kick stand switch, kill switch and more. Please make sure to check these things at least once a year:

  1. Proper dash lights illuminate when ignition on, but motorcycle isn’t running.
  2. Day lights (if equipped) – ensure they come on when the motorcycle ignition is on but motorcycle is not running.
  3. Headlight low beam
  4. Headlight high beam
  5. Left turn signal front
  6. Left turn signal rear
  7. Right turn signal front
  8. Right turn signal rear
  9. Taillight
  10. Brake light when applying front brake
  11. Brake light when applying rear brake
  12. When in neutral and kick stand down – bike starts
  13. When in neutral and kick stand up – bike starts
  14. When in gear and kick stand down – bike doesn’t start
  15. When in gear and kick stand up – clutch released – bike doesn’t start
  16. When in gear and kick stand up – clutch engaged – bike starts
  17. When in gear and kick stand goes down – bike stops
  18. When in neutral and kick stand goes down – bike continues running
  19. Kill switch turns off motorcycle

I did a brief run down in this video for my 1000sx

Change your Brake Fluid

I find that one of the most neglected maintenance items on a motorcycle is the brake fluid. The worst part about it is the fluid change procedure only takes ten minutes – it’s faster than an oil change! Most motorcycles state to do it every two or three years. The reason for the frequency is due to the limited amount of fluid in a motorcycle and the critical nature of the brakes on a motorcycle.

Brake fluid absorbs moisture rapidly. Moisture comes from multiple sources in a brake system, even if it is closed. Condensation from environmental factors. It could be a cold garage and you pull it out on a hot day. Winter time causes condensation on motor oil and brake fluid. The super low temperatures at night then warmer temperatures during the day. Or if you ride in the cold and heat up the brake fluid by using your brakes a lot. Condensation gets in from other ways too, but the bottom line is it does get in there.

Why is this a big problem? Compression. Water is far more compressible than brake fluid. So as moisture builds up, your brakes become squishy and do not have the stopping power that they should.

Another problem with water in the brake fluid – corrosion. Parts start deteriorating and even rusting. Holes start forming in the brake lines from the inside out.

Air can also work its way into the system over time. This doesn’t happen much if the system is well maintained and there are no leaks, but it can occur. A lot of people just bleed their brakes (remove air) on occasion and not do a full change. You’re already half way there with bleeding, do the full change!

“But the bottle says good for 50,000 miles!”

Yea, sure – but it doesn’t have how long it is good for time wise. That bottle is also going with the larger market, passenger vehicles (cars, trucks, suvs, vans).

Follow the factory recommendation for your motorcycle, but most common is two or three years to do a full change. I personally do it every year since it is such an easy process.

Motorcycles with ABS may not get a full change unless you have the systems to actuate the ABS modules. That’s okay though, as the other 95% gets changed and then if you trigger the ABS the fluid will work its way through. My Kawasaki motorcycle is supposedly an open system when off, making it a full 100% change.

So get out there and change your brake fluid before the riding season comes up. Brake fluid is cheap, just make sure you get the right stuff. DOT 4 is reverse compatible with DOT 3. Do not put DOT 3 in a DOT 4 motorcycle though. Make sure your motorcycle isn’t DOT 5, in which case you will need DOT 5. Check your owners manual, or most times the fluid type is printed on the reservoir cap.

Below is a video I did for the brake fluid change on my 2021 Ninja 1000SX. The procedure will be very similar across all motorcycles.

The following products may be helfpul:

Get Your Bike Ready, It’s Time To Ride

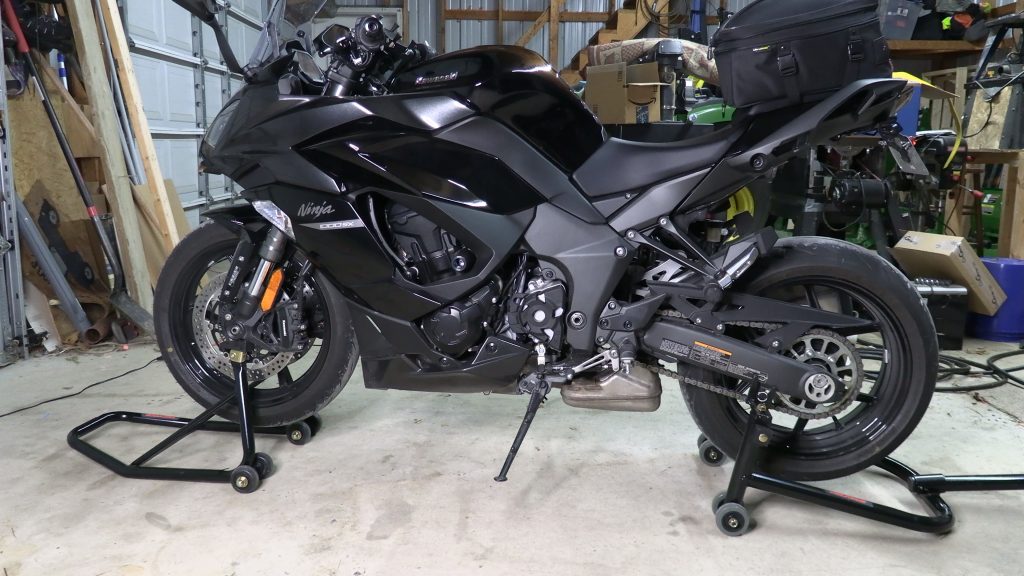
The fresh scent of Spring in the air, birds chirping, trees and plants blooming and riding weather will be quickly upon us, though some it has already come. You may have already started your riding season, but for some of us it hasn’t yet; however, it is quickly approaching. With the beginning of riding season, you need to get your bike ready. If you ride year round, or live in an area where the weather is nice year round this post may not really apply to you. For the rest, read on.

If your bike has been sitting, there are a couple things you need to do to ensure it is ready to ride. Some of these things are part of standard pre-ride checks, but others don’t occur as often.

Battery

Hopefully you did one of two things during the off-season. You either removed the battery and brought it inside or put it in a warmer climate area or you had a tender hooked up to it. If you did neither of these, your battery is going to need a charge. Hook up a charger and get your battery ready to go. Nothing is worse than hitting nice weather and you go to start your bike and it does nothing or you get that awful starter sound where it just doesn’t have enough juice to engage. There is a possibility where you may even get the bike started, but it may not have enough juice to start again unless you ride long enough. If your battery is completely dead, it is best to just replace it, as it will never be as reliable. In either case, get a charged battery ready for you to ride.

Gas

I am hoping everyone put stabilizer in their fuel before the off-season. Gas goes back quickly, especially gas with ethanol. Without stabilizer, the gas breaks down and gets gunky. You may go and start your bike and it starts fine, but that gunk is going to clog your filters, injectors or carbs and maybe even your fuel pump. If you didn’t put stabilizer in your gas, it is time to find a can and drain the tank and put fresh gas in. If you did stabilize, hopefully you stabilized with a full tank. If not, there may be some rust in your tank now if it is metal. Be careful about this, that rust will continue eating through the tank until you spring a leak. If you did have stabilizer, your gas should be good to go. If it seems to run rough, go ahead and drain it and use it in your lawn mower, pressure washer or some other machine and put fresh gas in.

Tires

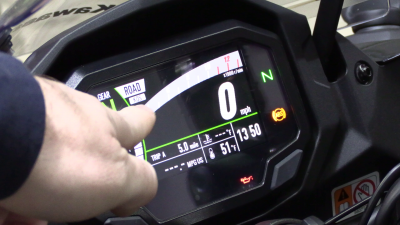
Your tire pressure is more than likely low. My tire pressures are 36 PSI up front and 42 PSI in the rear. When I checked the other day, they were 20 and 24. Check your pressures and make sure they are correct. Most times you should go with the motorcycle recommended settings (can be found on swing arm or some other sticker on the bike, or in your manual). If you drastically change tires or other things, you may have custom pressures you use, just make sure they are right before you begin riding.
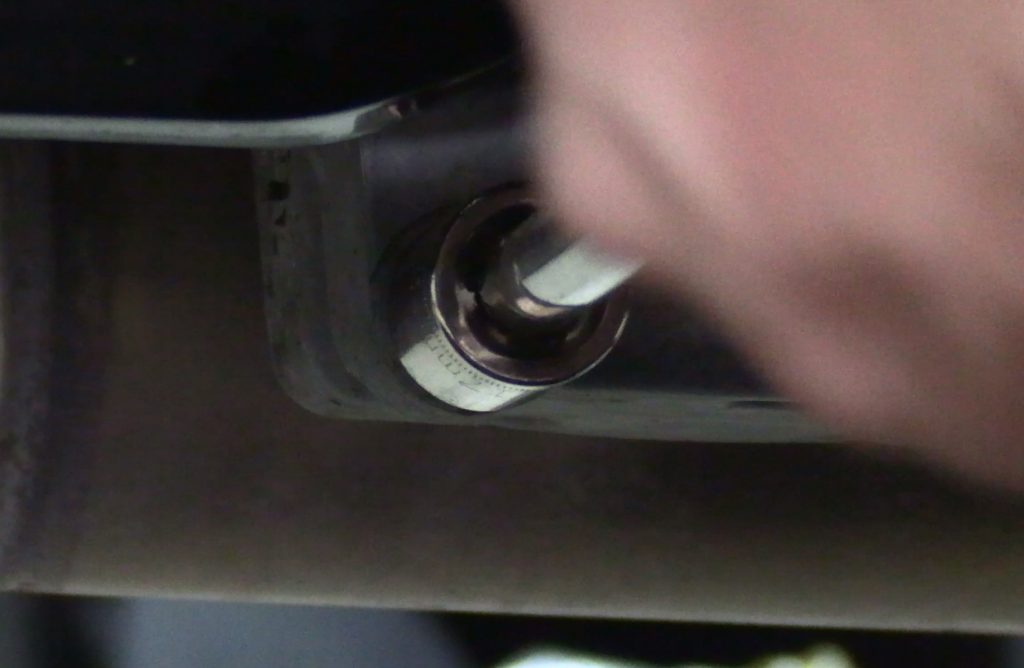
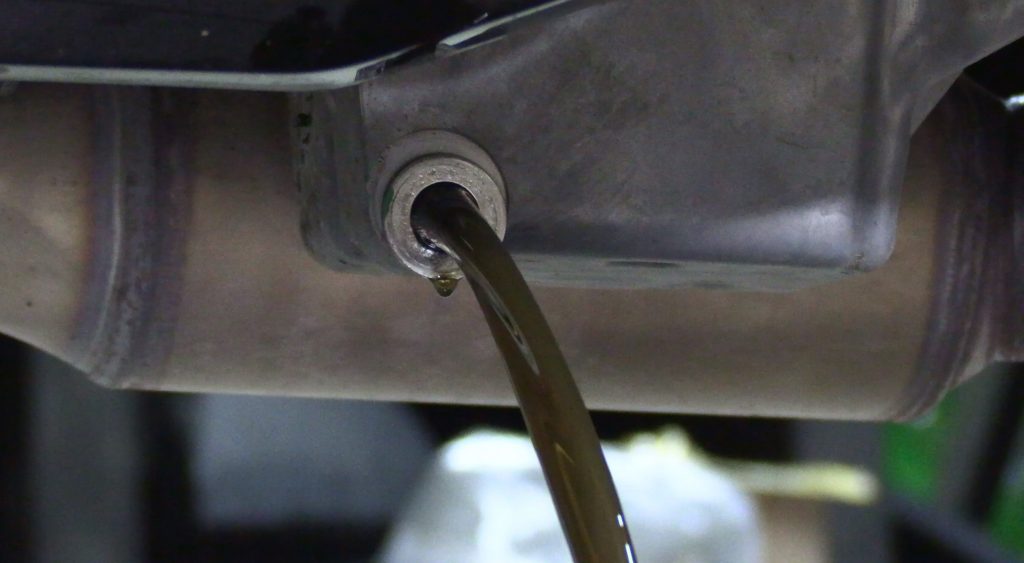
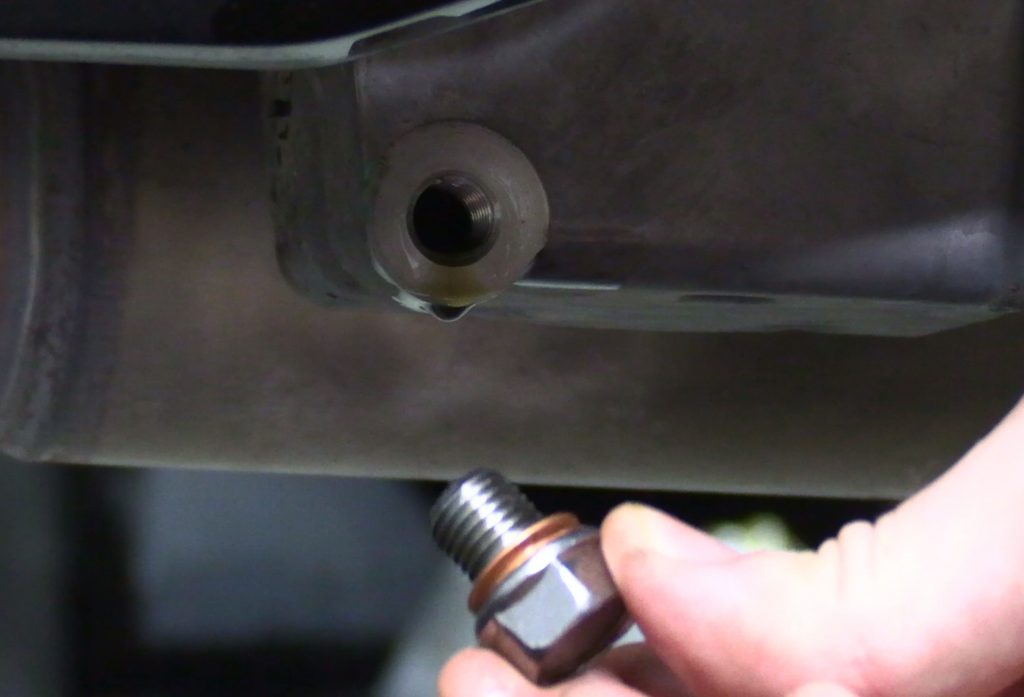
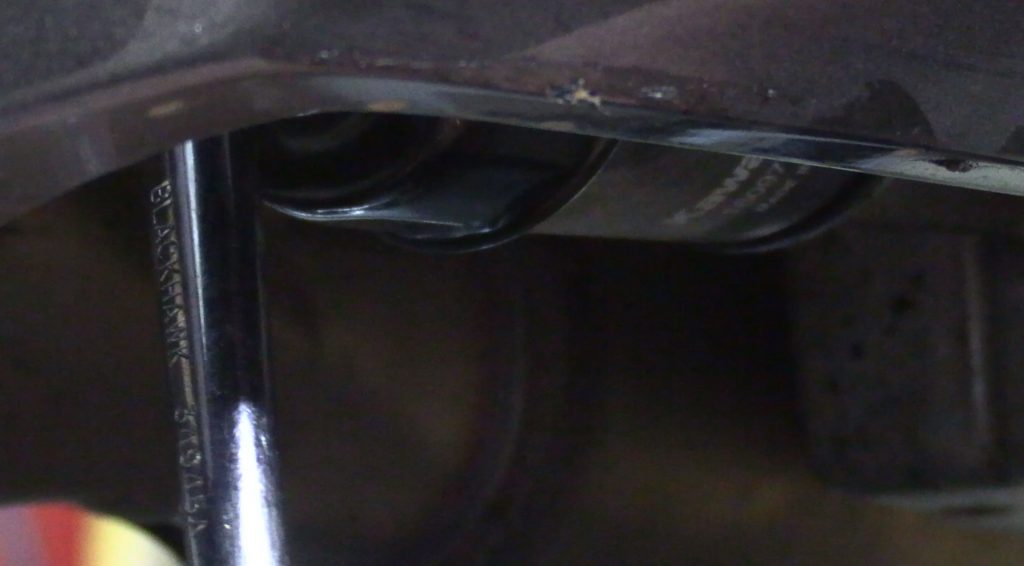
Oil

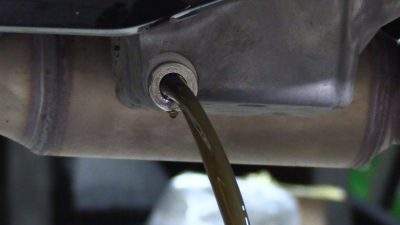
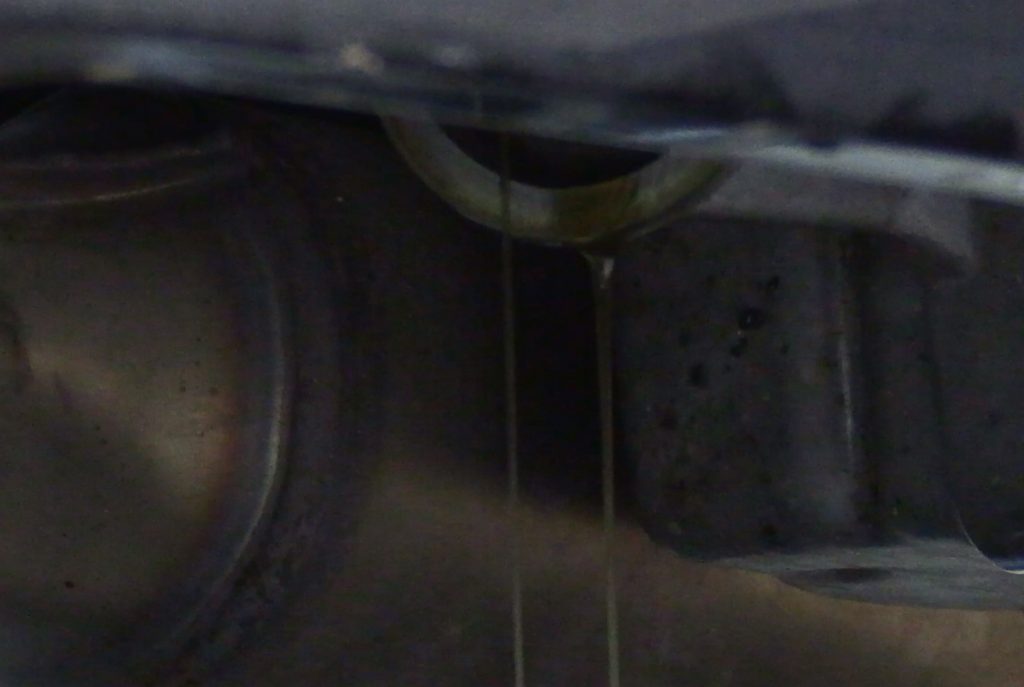
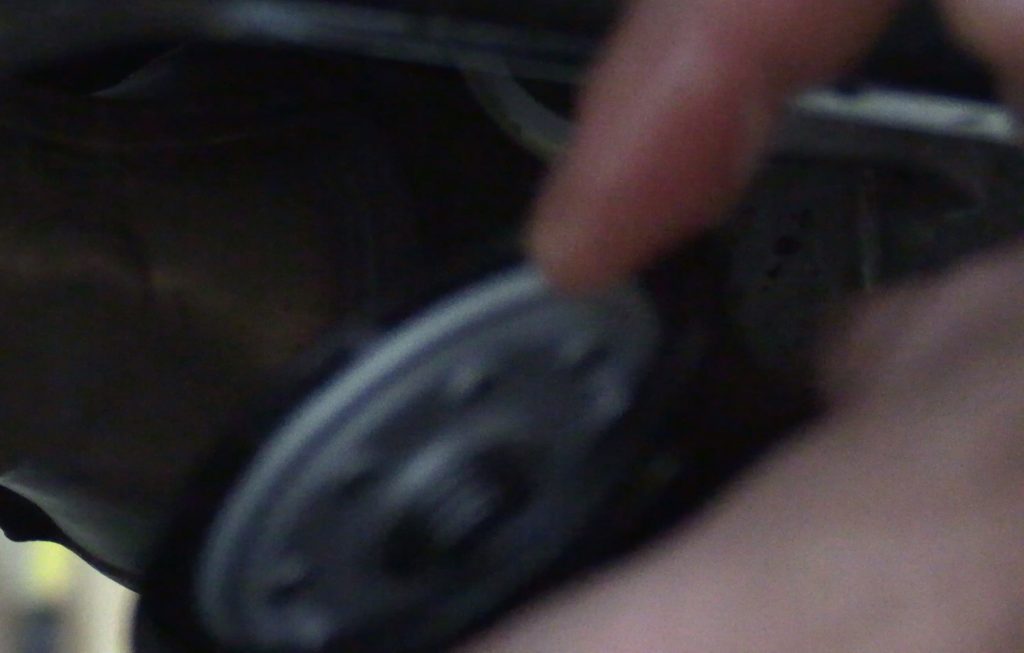
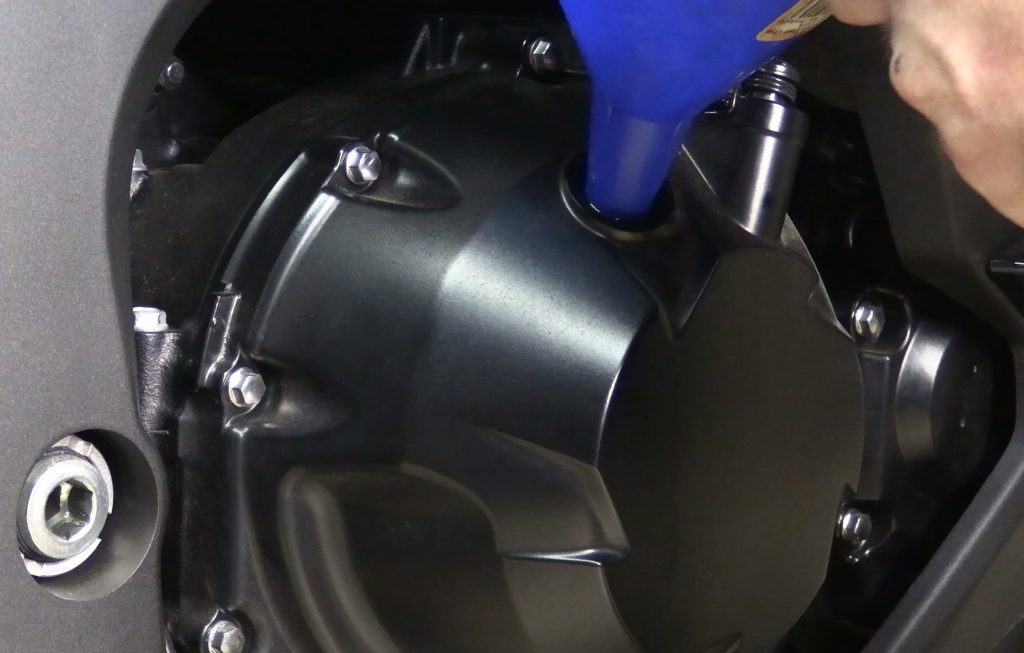
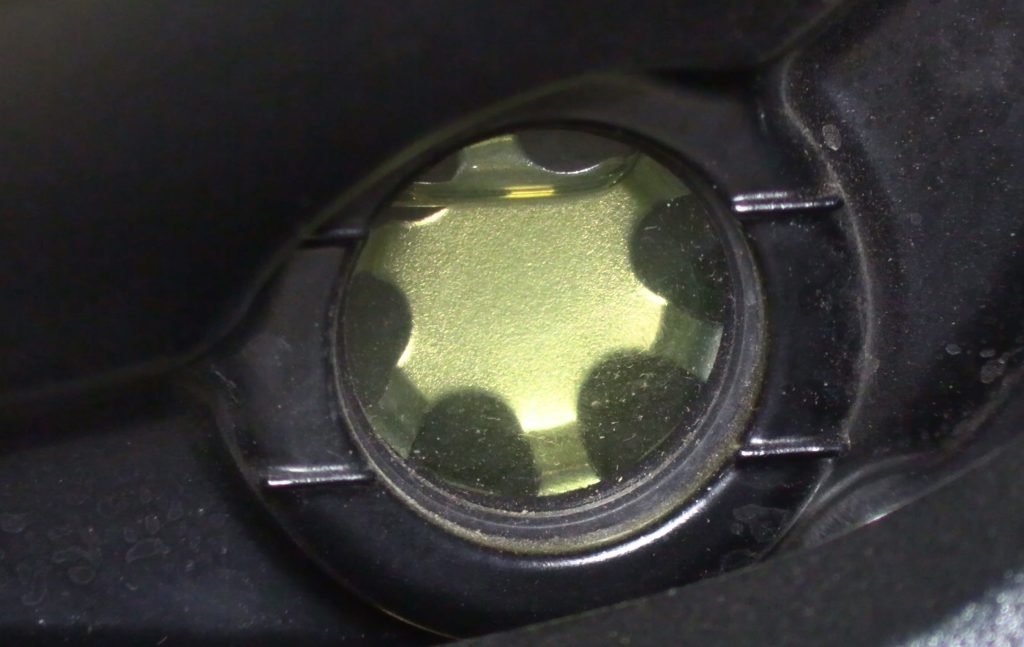
There tends to be this misconception that if you just changed the oil before the end of the season that you don’t need to change it in the Spring. This may be true in your case, but it most likely isn’t. If your bike is stored in an area that cools down and heats up, condensation forms on the inside of the motor. Oil loves to absorb this moisture and it gets ruined. This doesn’t matter if you are using conventional or full synthetic – it still absorbs the moisture. Sometimes you may go to check your oil before the riding season to make sure the level is good – something you should do before every ride, and it looks cloudy or milky. You may even see condensation on the site glass (if you have one) because the warmer weather has heated up on the outside and caused little water droplets inside your engine to form. In any of these circumstances, you need to change your oil. Don’t run your bike with water logged oil, it isn’t good for it. If you had a climate controlled garage, brought it in your house or a few other rare situations, you may be okay, in which case you just need to make sure you have the proper oil level. Check for any oil leaks, especially around the drain plug and filter. Make sure no hoses are leaking, etc.
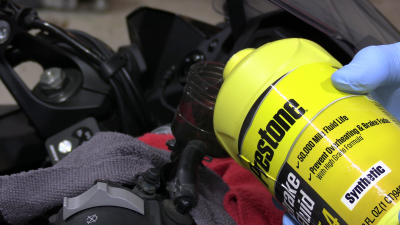
Brake Fluid

Brake fluid is like oil in the way it absorbs moisture; however, it doesn’t need replaced every year. Most manufacturers recommend every two years. The reason is that brake fluid breaks down over time, but it also absorbs moisture for the same reasons your oil does – condensation. Some think it is a closed system, so moisture cannot get in – but this isn’t the case. The same thing happens as the engine, if the brake lines, reservoir, calipers and such warm up, and the insides are really cold, moisture forms. If you are at the two year mark, this is the time to change out your brake fluid. If not, just check the levels and make sure all is good. The last thing you want is to not be able to stop. Check

Engine Coolant

If your bike is liquid cooled, this applies to you. Engine coolant is not affected by moisture like oil and brake fluid, but the lubricative elements of the coolant break down over time and with use. These keep your water pump functioning and not bind up. Other elements in the coolant keep corrosion from happening inside your radiator and lines. Replace your coolant at manufacturer recommended intervals. A lot of bikes this is two years, and the best time is at the beginning of a riding season. If you are not due for a replacement, check the level and for any leaks around the radiator, hoses and engine.
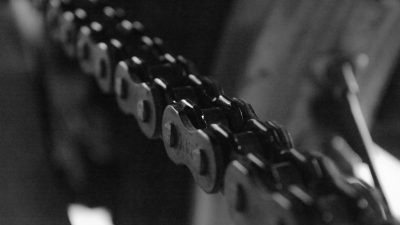
Chain

Hopefully you cleaned and lubed your chain before the end of last season, but in either case, it is a good idea to clean and lubricate it before the season. The reason is if it is sitting, well, anywhere – dust and other debris can accumulate on the chain. A good cleaning never hurt it, but at the very least lubricate it. Check the tension and make sure everything looks good as well as the sprockets.

Brakes

Checking the brakes on a motorcycle can be a chore, but if you are not sure of the wear levels it is worth checking to make sure your pads are good. Braking is very important for any vehicle, as you need to be able to stop. Sometimes you can get a flashlight and the right angle to look down in the calipers and see the pads, maybe even see the wear notch. If not, go ahead and pull the calipers off and check the wear level of the pads. The fronts will tend to wear down quicker than the rear, but always good to check both. If they need replacement, go ahead and do that so you can stop when you need to.

Standard Pre-Ride Checks

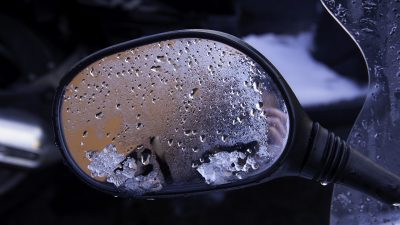
Make sure to perform your standard pre-ride checks that you do (you are doing them right?) before every ride. Walk around the bike and look for any leaks. Check your lights to make sure they are working, as well as your horn. Make sure your steering works as expected. Check your brakes and throttle response to make sure everything is as it should be. Make sure you have your latest insurance and registration for the bike.

The responsibilities that come with owning a motorcycle may seem like a lot, but they are to keep you safe and your machine running in good working order where it will last a long time. Be sure to do all your service maintenance at the proper intervals. Some are every year, two years, five years. Some are just by mileage. Go through your manual or look up the service schedule online. Keep your bike healthy and happy and it will return the favor.

Once you are all set, head on out and enjoy! Keep your eyes up and two wheels on the ground. Be sure to watch for all of the cars (cagers) out there – they aren’t used to seeing bikes from the off-season, so they will be even less likely to be looking. Stay safe and hope to see you out there!

The Importance of Chain Maintenance

I decided to write this post after coming across a post on a facebook group I am a part of where the OP was asking for recommendations for new chain and sprockets because their chain snapped. Naturally, I asked to myself, “How did the chain snap?” To the comments!

Someone else asked the same question, and the OP’s response was that it was an old chain and they had it serviced at the dealer at the beginning of the year and was hoping to get another year out of it.

Queue the red flags, the sirens, the red alert, everything! They had it serviced at the beginning of the year! Why is this bad? Well, unless they only rode a couple hundred miles and never in the rain then there needed to be more maintenance done. Don’t get me wrong, it is possible that they only rode a couple hundred miles during the year, but by the way the comments were going from the OP this was not the case.

You should always lube your chain after riding in wet weather or washing the bike – this is critical. I will get into more on that in a minute. You should clean and lube your chain about every six hundred miles or so. If you are on a long trip you can get away with just lubing it rather than cleaning it all the time as you do need a water source to rinse the cleaner off.

Why? Well, the chain is metal for one. We aren’t talking stainless steel or aluminum, just regular steel. What happens when regular steel gets wet? It rusts. What also happens? The water seeps into the pins (unless they are sealed, but even then it can still get in there) and rust forms which then causes friction which causes wear. By not lubing your chain after it gets wet, you are going to shorten it’s life quite a bit and it won’t be as safe to ride. Water can also remove the lubrication, which then wears your sprockets.

As for cleaning – think about where that chain is. What it is going through and picking up. Dust, dirt, tar, little gravel, grass and more. This stuff just accumulates which then causes premature wear on the chain and your sprockets. So cleaning it off every so often is just a good idea, but you need to wash the cleaner off before lubricating otherwise the cleaner will actually render most of the lubricant useless.

You might be thinking, okay – so I’ll just replace the chain and sprockets (remember to always change both, never just one or the other) as the wear. Well, that’s like saying you’ll just change the oil in your car when it gets low rather than at it’s scheduled maintenance thereby leading to wear on the engine. When your chain starts wearing prematurely, it isn’t a natural wear. It cuts grooves and weakens links in the chain. Now think about this – if you’re going 70mph and the chain snaps it’s going to fling up, rip the plastic chain cover to shreds, then smack your engine typically ripping a chunk right off thereby destroying your motor. Is it really worth it then?

Another benefit to regular maintenance on a chain is it gives you a chance to inspect it. Notice any bad wear patterns, or bad looking links. Things that may be an indication of an impending failure so you can take care of it before you end up totaling your motor.

A well maintained chain and sprocket set should be able to last 20k – 30k miles. Neglect can shorten that drastically.

Do yourself a favor, take the time to maintain your chain. If you’re going on a long trip, make sure to carry chain lube with you for if it rains.

Stay safe out there and keep the rubber side down.

Chain Maintenance

Five Things for Storing Your Motorcycle for Winter

$*#@ $*@!# @$$ AHHHHHHH!

It’s that time of year… The time when a lot of riders put away their babies for the cold, icy and snowy months. There could be many reasons for this. Perhaps you just don’t like riding in the cold. Hey, 50 MPH in 30 degrees has a wind chill of 12 degrees Fahrenheit. Burrrrr. I’m cold just thinking about it. That being said, there is a ton of gear out there to keep you warm including heated gear, but it just isn’t for everyone – not to mention the expense for the gear.

Then you have those who don’t want to risk the ice. I’ve hit my fair share of black ice. It will scare the living crap out of you I will tell you. It will completely catch you off guard. Then of course there is the snow and ice that comes with winter in general – not fun to ride in. Some do, some have the tires for it, but it isn’t for the faint of heart. Along with it of course comes the salt, which will make you cry to just think about it on your baby. Or worse, that pre-treatment stuff that eats everything it touches. Here in PA, they use cinders too. I could go on a whole rant about what a waste cinders are – they chip everything up, they really don’t give you any more traction than a good salted road, and when the snow is gone, they are everywhere and you are dodging them like crazy – just a lot more random gravel patches to watch out for.

You may live an in area that just gets way too much snow to even try riding – you need four wheel drive, not one wheel drive and just two wheels on the ground. I hear you, and I do not look down on any rider who decides to winterize their bike and hang up their helmet until the beautiful Spring weather hits. Heck, I stop riding around October around here because of deer! Yes, you heard me, I stop riding even though there are seventy degree days if there is any chance I would get stuck in the evening hours. Any time after evening is bad too. Let me tell you, the deer are crazy. I’ve hit sixteen deer! Not with the bike, thank goodness, but that is not a good track record, and in the country – they are in abundance. I will get out for a few afternoon rides, just be back by five.

In any case, when you decide to pack your bike away for the winter, there are several things you need to do in order to ensure it’s wellbeing and that she will be happy to see you in the Spring and run perfectly for you.

Wash your Motorcycle

Number 1: Clean your bike! Yes, clean it. You may be one of those who cleans her every day before you ride, or you may be one where your bike has never seen the gentle soothing soap bubbles that leave her gleaming in her glory. No matter which one you are, give your bike a bath. Get all the bugs, tar, paint and any other road grime off that has accumulated. If you don’t want to give her a full bath, at least clean the chain and lube it. That chain goes through a lot, and you need to take care of it.

Fuel Stabilizer

Number 2: Put fuel stabilizer in the tank, fill her up and run it for five minutes. This is very important, especially if you cannot find gas without ethanol. Gas gums up, pulls in moisture and can break down into some very nasty stuff in a couple months. There are a bunch of fuel stabilizers out there. I used to use Sta-Bil. It did the job, until my Camaro. It would run like absolute garbage in the Spring. Popping, surging, you name it. Now my Camaro is built, it needs the best fuel it can get, and even with Sta-Bil, it was not happy. That’s when I started using Seafoam and it has never been happier. Not only does Seafoam put Sta-Bil to shame in terms of longevity (ahem – 2 years) – it cleans your fuel system too! It helps with the moisture and ensuring the gas is ready to go in the Spring so you have a very happy lady. It comes in 16oz bottles which is more than enough for your motorcycle. 1oz per gallon as a stabilizer. Did I mention it cleans your fuel system? That’s right! Your injectors, carbs, pump, filter and all will be so happy you added that come Spring. If you don’t want to use Seafoam, that’s fine, but make sure to get a quality stabilizer. Do not skimp on this! If you do, you will eventually have a very angry lady and a very expensive bill.

Battery Tender

Number 3: Battery tender! That’s right, you need to get a battery tender on your bike. Some people just unhook the battery, pull it and put it on a shelf. Lead acid doesn’t do well with just sitting. If you have a lithium battery, DO NOT let it freeze. Those of you with normal led acid, agm, etc – just hook up a battery tender – just make sure it is made for your battery. A lot of them support all types of batteries now, just make sure to set it right so you don’t overcharge an AGM, etc. I use a CTEK 40-206 and it works great – plus it will recondition your battery. You can hook a connection right up to the battery and run it to a convenient spot. My Ninja 1000SX I have run up under my rear seat. Plug it in and forget it – well, until you go to take the bike out, you don’t want to start riding off still hooked up!

Number 4: Paddock Stands/Motorcycle Lift. This really depends on your bike. Sport and sport touring bikes will want to be on paddock stands. Cruisers, tourers, etc may have center stands, but may also require a different kind of stand. Do your research, pick what works for your bike, and get those tires off the ground. This avoids flat spots in the Spring. Good quality tires will eventually have those flat spots smoothed out, but with the sticky compound used on sport bikes and such – you don’t want them sitting in one spot too long. If you don’t want to have it on stands, make sure to move it around into different positions every couple weeks.

Motorcycle Cover

Number 5: Cover her up. Get yourself a cover, a sheet, anything. Keep the dust and other bugs off of it and avoid any scratches while you are searching for your long lost 10mm socket one day. If you have kids, a cover is a must, at least with my kids lol.

Stay safe, stay warm and see you in the Spring!

Changing the Oil on your Motorcycle

One of the most important things you can do for your motorcycle is maintenance. Part of the maintenance cycle is an oil change. In order for internal combustion engines to operation, there must be oil. This allows the friction areas of the engine to run without binding up, overheating and causing catastrophic damage to the motor itself.

Over time, oil breaks down and accumulates moisture. This is why it is imperative to change oil at regular intervals, both mileage and time. Modern synthetic oils can last longer, but motorcycle engines are delicate, especially on sport bikes where they are performance engines, which is why it is still best to change the oil at 3000 miles or annually, even when running premium synthetic motor oils.

Oil changes are one of the easiest maintenance tasks to perform as long as you follow the proper procedure.

  • Remove drain bolt and drain oil
  • Remove oil filter
  • Lube new oil filter (the gasket and threads with clean new oil)
  • Install new oil filter
  • Replace drain bolt (possibly with new washer)
  • Add new oil
  • Check level (it should be over full at this point)
  • Run bike to warm it up and have oil fill the filter and other parts of the motor
  • Turn off bike and wait before checking oil level again – it should be correct now

Any person is capable of an oil change if they have the right tools. The tools are affordable and there is nothing too costly – the oil will cost the most.

  • Oil (proper weight and quantity)
  • Oil Filter
  • Crush washer (if applicable)
  • Filter Wrench
  • Socket Wrench for drain plug (do NOT use a crescent wrench)
  • Drain pan
  • Funnel (optional, but highly recommended)
  • Torque wrench (optional, but highly recommended)
  • Bike stands or lift (optional, but highly recommended)

Performing the Oil Change

motorcycle on stands
Bike on Stands

Don’t mind the messy garage :-).

It is preferable to get the bike in the air. Bike stands for sport bikes or a bike lift for cruisers, etc is recommended. This allows you to easily get the bike off the ground and a drain pan under it.

Remove drain plug
Remove Drain Plug

Place the oil pan under the oil pan/drain plug on the bike, find the right size socket and remove the drain plug. Make sure to get the existing crush washer or gasket if there is one.

oil-draining
Oil draining from oil pan

Let the oil drain from the bike until it starts coming out as a very slow drip. You will see the crush washer left on the image above – remove this washer if it doesn’t fall on its own. You may choose to warm the bike up before removing the drain plug. This allows the oil to thing down a bit and come out quicker, but you still have to wait for it to drain out of the engine components since it had just run. The choice is yours.

replace drain plug and crush washer
Put a new crush washer on the drain plug and put it it back in the oil pan

You may choose to do this step before or after the oil filter. In either case, place a new crush washer or gasket on the drain bolt (if applicable, some bikes don’t require this). For crush washers, I prefer to use the copper washers that crush down as you seat the bolt. Hand thread the bolt back into the drain pan until finger tight. Then use tighten the bolt down with your socket. Use of a torque wrench is highly recommended and torque to factory specs.

remove oil filter
Remove the oil filter with an oil wrench

Remove the oil filter with an oil wrench. You can get adjustable oil wrenches for use with a socket wrench or fixed sized. Don’t use a spanner wrench as these are known to round off and crush the oil filters. There also isn’t much room to work, so the oil wrenches that go on the back of the oil filter are the best in my opinion. Make sure to turn it the right direction (lefty loosey)

oil draining from filter port
Let the oil drain until it comes to a slow drip

Let the oil drain from where the oil filter was. You should let it drain until it is a slow drip. Make sure the oil filter gasket did not remain in place as this will be a guaranteed leak if not removed.

lube gasket and threads
Lube the gasket and threads of the new oil filter

This is very important. Make sure you get some fresh clean oil and lube the gasket and threads of the new oil filter. This prevents leaking but also prevents the gasket from sticking to the motor and allows for easier removal in the future when you go to change the oil again.

Install new oil filter
Install the new oil filter

Install the new oil filter. By hand, find the center and align the threads and thread the new filter on. Make sure you do not cross-thread the filter. It should spin on easy. Screw on the filter until it is finger tight. For motorcycles, it is highly recommended to use the oil wrench and your torque wrench and tighten to factory specs. You may choose to hand tighten, but make sure to not over tighten and certainly not have it too loose. You want to spin it on until it is finger tight then give it about a quarter of a turn hand tight. Again – it is preferable to torque this down to factory specs rather than by feel. Once done, wipe everything down.

Fill with oil
Fill with oil

Now fill the bike with oil. You will want to refer to your owners manual to check what type of oil and how much. Usually there will be quantity with filter change, without and dry. You changed the oil filter, right? If not, go change the oil filter – always change it with an oil change. Then make sure you have the quantity of oil for with a filter change. Your manual may also indicate different grades of oil based on temperatures, so make sure your climate lines up with what you got and also make sure you get motorcycle oil. It is very important that you use motorcycle oil and not regular car/truck oil. Since your clutch is lubricated by the engine oil, there are special additives that are in motorcycle oil that are critical to the proper operation of the clutch. Take a funnel and fill up the engine with the specified quantity.

Check oil level after filling
Check the oil level after filling

You may have to refer to your owners manual, but typically there are two ways of checking the oil level in your motorcycle. You either check a sight class or a dip stick. In either case, you want to check that the oil is full, and in most cases it will read over full as oil has not been primed into the oil filter. As seen in the image above, the oil level is above the two marks meaning it is too full, but that is okay, because we have to run the bike yet. If it is reading low, you need to add more oil as it will be very low after the oil filter gets filled up. When checking oil, make sure your bike is perpendicular to the ground and not sitting on it’s kick stand. This is another reason bike stands or lift are useful. If you have a center stand that would work as well. Once your oil level is full or over full, start the bike and let it warm up.

Check the oil level in the sight glass

While running the bike, if you have a sight glass you may notice it drop completely from the sight glass. This is fine while running. Once you turn your bike off, wait five minutes then check the sight glass and the oil level will be at the final level. It should be between the two lines on a sight glass or in the markings on a dip stick. The best place is right in the middle of the markings. If this is the case, you are good to go and your oil change is complete. If it is too low, then add some more oil, start the bike for a bit, let it rest for five minutes and check again. Repeat as necessary. If the oil is too full, as in above the lines, you will need to drain some. This is a bit of a hassle, but the easiest way is to get a pump and pump it out of the fill port. You will loose too much via the drain plug or oil filter, and you will have to replace the crush washer if you had one with the drain plug. Always best to pump it out.

I performed an oil change on my 2021 Kawasaki Ninja 1000SX and placed the tutorial on YouTube which you can watch here.

Hope this helps, and if you have any questions, don’t hesitate to ask.